結婚週年禮物的蝙蝠偵測器DIY
蝙蝠這生物,傍晚我家附近常可以看到牠們飛來飛去,偶而還會撿到屍體。大概國小學生都知道牠們會發射超音波,用回聲定位來覓食吧?不過不是每種蝙蝠都會這招,像大蝙蝠科的狐蝠主要靠視覺和嗅覺來覓食。
我沒看過台灣狐蝠,不過在2003年一月去柬埔寨的時候,倒是意外看見另外一種狐蝠,大概是馬來大狐蝠(Pteropus vampyrus)吧。
不知道現在那邊還有沒有,但還是說明一下位置,位置在GRAND HOTEL d'ANGKOR對面的Royal Gardens,那個公園裡有好幾棵雙翅龍腦香,傍晚五點多的時候會飛出去覓食。各位最近如果要去吳哥窟,倒是可以順便去繞繞。
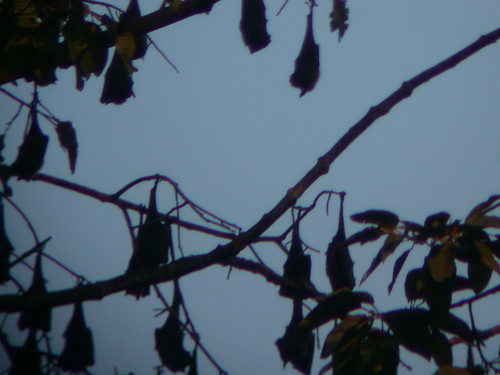
我們那時路過公園,意外看見樹下有很多大便,抬頭一看,哇!一群蝙蝠,而且是展翅超過一公尺長的大蝙蝠,經我們估算大約有兩千隻。不仔細看還以為是果實吊在樹上。隔天我們就早上六點和傍晚五點的時候,都特地去看蝙蝠。
早上去的時候,他們都已經覓食回來了。剛回來還沒睡著,偶而還會吵個小架、佔個地盤,看起來很有趣。傍晚大約到了六點十分左右,蝙蝠們開始蠢蠢欲動,有些在搔癢,有些在互抓像是在玩一樣。五分鍾之後,開始有蝙蝠飛出來,但只是在熱身而已,只是飛來飛去換樹待 著而已。光看他們在樹冠層頂飛翔,就可以知道他們有多大隻了。
他們胸前有著很美麗的金色毛髮延伸到腹面,頭部不同於一般小翼手目的蝙蝠,而是像狗頭一樣。過了幾分鍾之後,蝙蝠們開始飛翔出去覓食,飛了二三十分鍾,還有蝙蝠還沒飛出去,可見數量有多龐大,整個天空都是翼展一公尺以上的大狐蝠。

除了大蝙蝠以外,蝙蝠還有不少是會發射超音波的種類。
超音波,就是聲音的頻率超過20000Hz,人耳已經聽不到了。如果我們要聽見,那就要靠
市面上的蝙蝠超音波偵測器好幾百元美金,折合台幣也是好幾千元
其中最簡單的電路屬於分頻式的電路
Build a Simple Bat Detector
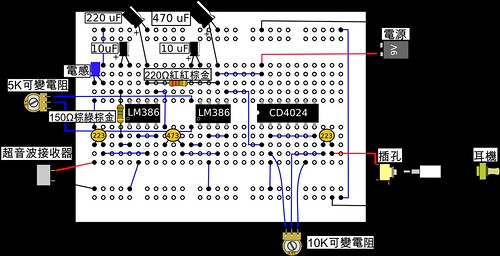
在經過原作者Tony Messina 的同意下,我將電路圖改繪成麵包板的插線圖,以下就是教各位DIY蝙蝠偵測器的方法。
電路圖:http://home.earthlink.net/~bat-detector/SBD2.html
材料清單:(以下零件價格為2008年4月於台北光華商場附近電子零件行訪價
| | 規格 | 數量 | 價格(元) | 備註 | 電路圖上編號 |
| 超音波接收器 | 40K Hz | 1 | 120~250 | 通常與超音波發射器一起包裝販賣 | |
| 電感 | 6.8mH | 1 | 10 | | |
| 積體電路IC | LM386 | 2 | 10 | | IC1 |
| 積體電路IC | CD4024 | 1 | 11 | | IC2 |
| 單音耳機插孔 | 3.5mm | 1 | 4 | | |
| 單音耳機 | 3.5mm | 1 | 80 | 若無法買到單音耳機,亦可使用一般耳機 | |
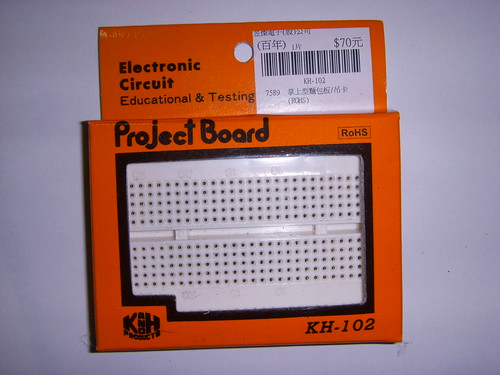
| 小型麵包板 | | 1 | 70~80 | 又稱免焊電子電路實驗板 | |
| 電解電容器 | 470μF 16V | 1 | 3 | | C4 |
| 電解電容器 | 220μF 16V | 1 | 2 | | C7 |
| 電解電容器 | 10μF 16V | 2 | 1 | | C2、C3 |
| 陶瓷電容器 | 0.047μf | 1 | 0.3~1 | 標示為473 | C1 |
| 陶瓷電容器 | 0.022μf | 2 | 0.3~1 | 標示為223 | C6 |
| 電阻器 | 220Ω 1/8w | 1 | 0.3~1 | 標示為紅紅棕金 | R4 |
| 電阻器 | 150Ω 1/8w | 1 | 0.3~1 | 標示為棕綠棕金 | R1 |
| 可變電阻 | 10KΩ | 1 | 6~10 | 調整音量 | RV1 |
| 可變電阻 | 5KΩ | 1 | 6~10 | 調整靈敏度 | R2 |
全部加起來不到台幣300元啊,有夠便宜啦
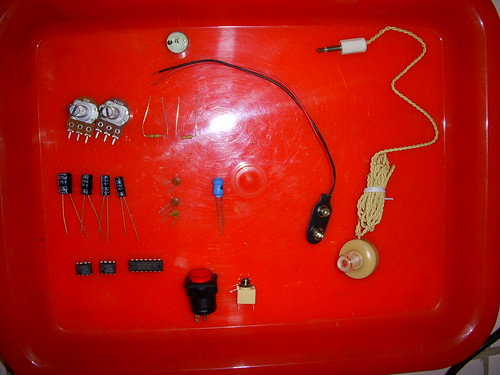
這是零件囉,才這樣一點點(不包括麵包板、機殼和旋鈕...)
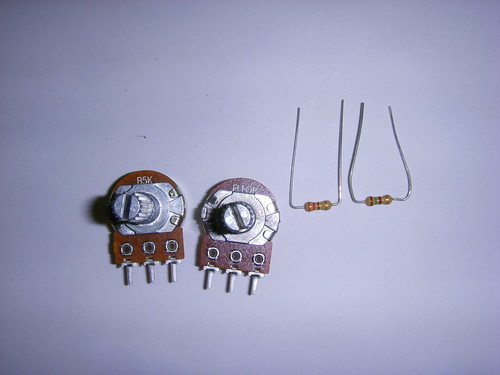
由左至右,5KΩ可變電阻、10KΩ可變電阻、220Ω電阻、150Ω電阻
電容:由左至右,470uF、220uF、10uF、10uF、0.022μf、0.022μf、0.047μf

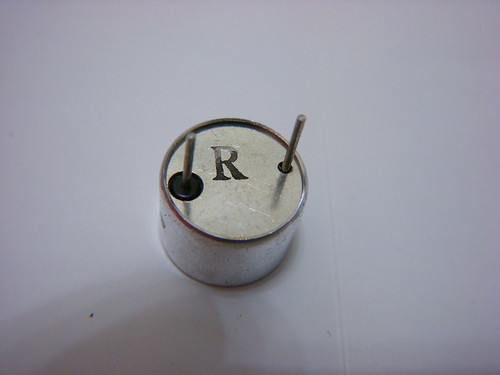
6.8mH電感和超音波接受器
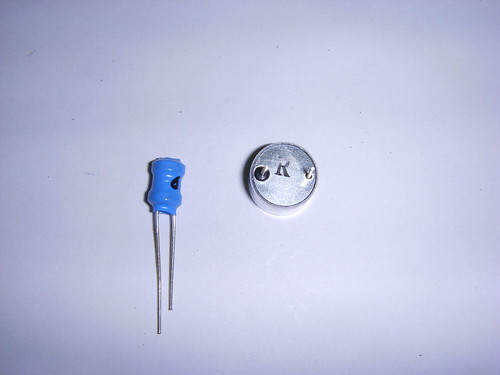
超音波接收器,左邊是正極,右邊是負極。
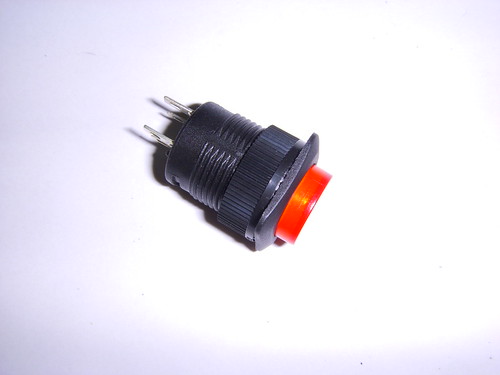
按鈕開關,用來控制電源。這個我沒有畫在麵包板裡,要加的自己在電源旁邊接上。
用小型麵包板就行了
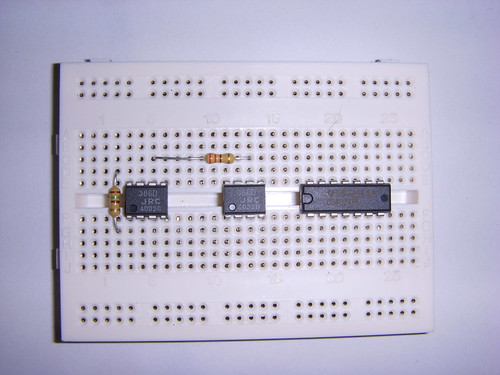
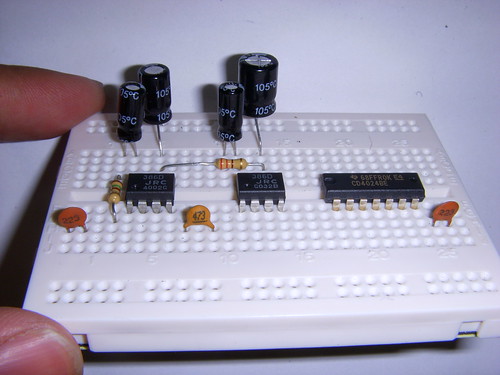
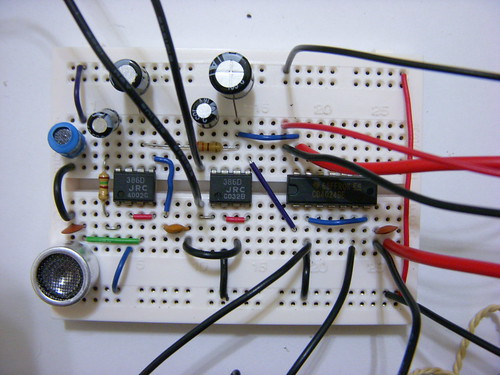
開始組裝,先插上IC,左至右:LM386、LM386、CD4024

再插上電阻
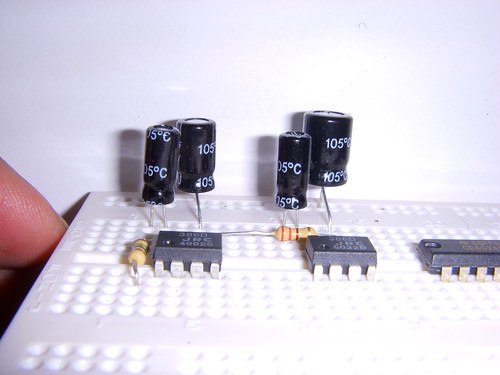
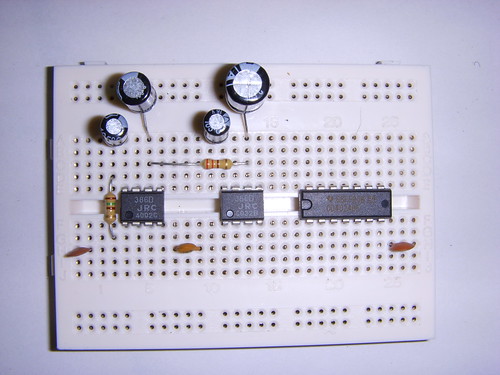
然後把電容插上去
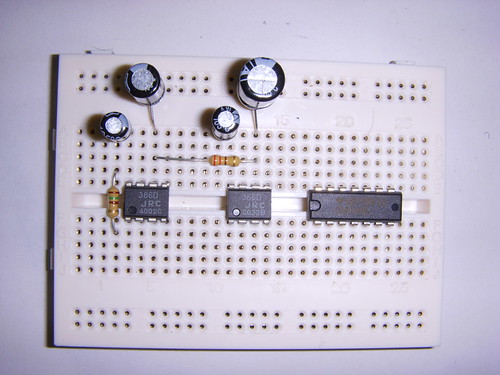
從側面看一下
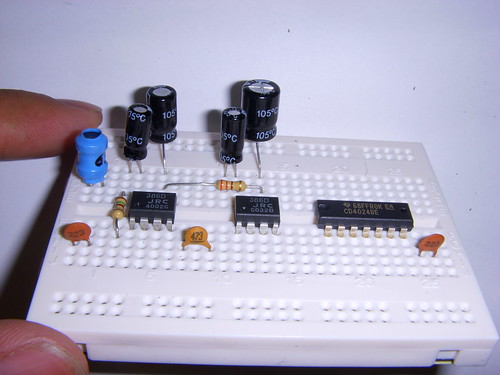
再來插陶瓷電容(上面寫223和473那種)
側面來一張
再來是插上電感(藍色那個)
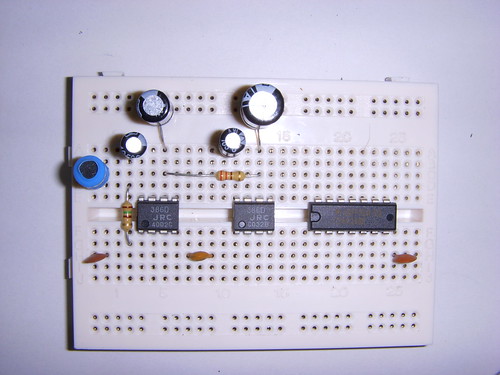
側面來一張
再來就是插上線
可變電阻先焊上線
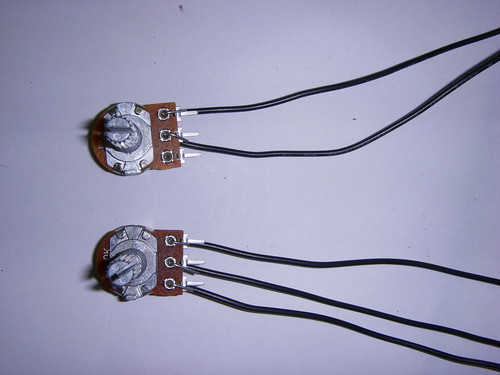
電源和耳機插座也焊上線

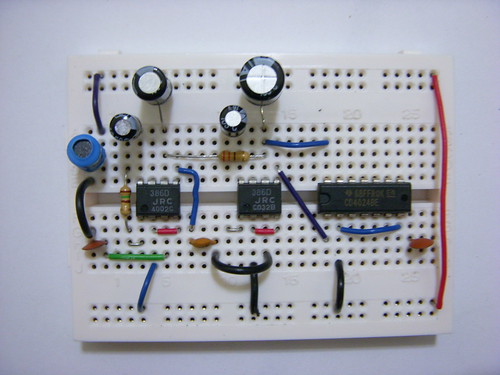
大合體,為了測試(測試方式,請看文末),先把超音波接受器插在板子上(左下角),實際用的時候,要另外接線
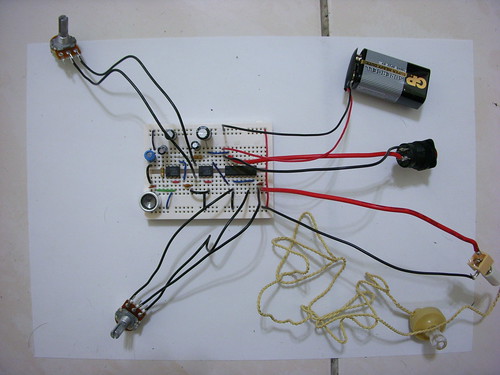
放近一點來看,左下角是超音波接受器。
再來是準備塑膠盒
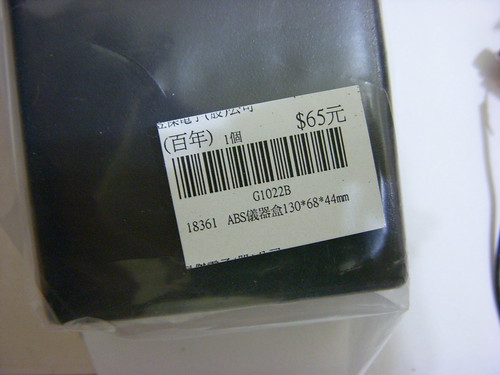
盒子上方要鑽可變電阻塞進去的孔,前面要鑽超音波接受器的接線孔,後面要有按鈕開關的孔和耳機插座的孔。

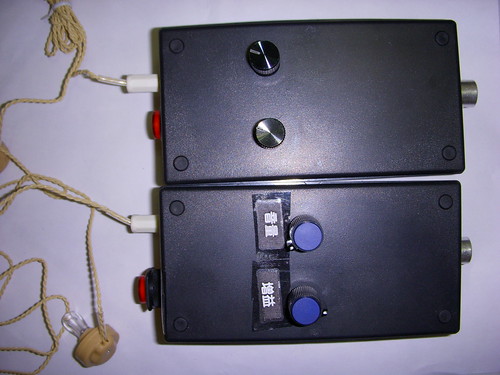
全部做好之後,再把旋鈕塞到可變電阻的轉軸上
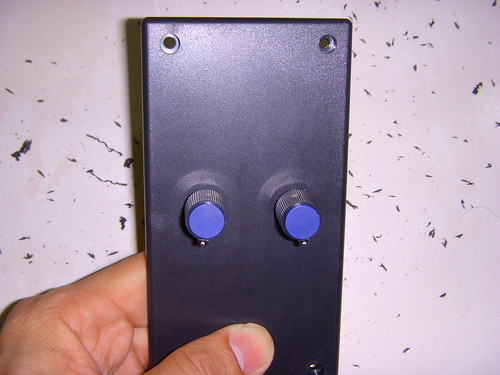
噹噹噹噹~
蝙蝠偵測器完工!其中一個是我的,另外一個是作給梅子的。
去年的週年禮物是DNA尋根套件,今年的就是
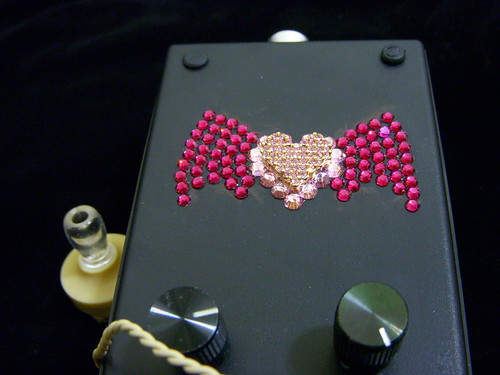
超華麗bling-bling蝙蝠偵測器
上面可是用施華洛士奇水鑽鑲了一隻可愛小蝙蝠呢!

中間還是個愛心哩。這個水鑽可是我特地去手機包膜專門店裡做的耶!
光是要在店裡掏出「蝙蝠偵測器」就很需要勇氣了,何況還要求鑲水鑽哩。
做好了偵測器,可是偏偏沒有蝙蝠怎麼辦?沒關係,週遭能發出超音波的東西其實不少
- 食指和中指互相摩擦上下襬動
- 摩擦塑膠袋
- 搖晃鑰匙
我把偵測器接上教室擴音喇叭,然後把機器放在教室的角落,人在走廊上晃鑰匙,它都偵測的到,的確很夠力啊!
這段聲音檔就是我把偵測器接上電腦錄到的東亞家蝠聲音
http://pancala.googlepages.com/bat.mp3
下一篇就要來介紹怎麼用軟體「看聲音」。