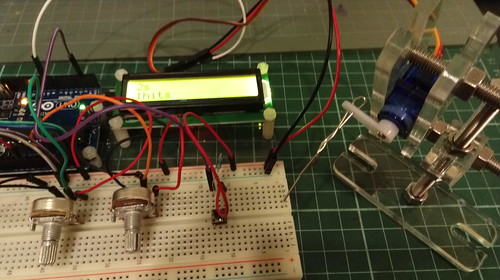
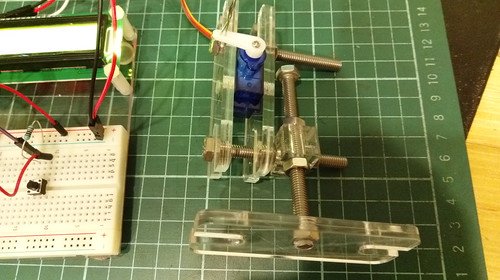
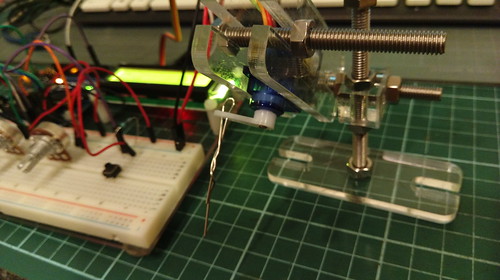
兩個可變電阻分別控制伺服馬達的擺動次數和擺動週期,調整的數字會顯示在LCD上面。確認好以後,按下按鈕就會執行動作一次,然後就停止。


程式碼下載
https://drive.google.com/file/d/0Bzwhi7Oh9a5ZZzdhTXJWZ0FPUUk/view?usp=sharing
按鈕從5v接D2,另外D2還有再接一個10k電阻到Gnd。(意思就是按鈕沒按的時候,D2接收到Gnd的低電位,按下去則是收到高電位)
伺服馬達的信號線接D9
控制時間週期的可變電阻接A0
控制伺服馬達擺動次數的可變電阻接A1
程式碼
=====
/*
Copyright (c) 2014 MediaTek Inc. All right reserved.
This library is free software; you can redistribute it and/or
modify it under the terms of the GNU Lesser General Public
License as published by the Free Software Foundation; either
version 2.1 of the License..
This library is distributed in the hope that it will be useful,
but WITHOUT ANY WARRANTY; without even the implied warranty of
MERCHANTABILITY or FITNESS FOR A PARTICULAR PURPOSE.
See the GNU Lesser General Public License for more details.
Note: Only D9 and D10 is supported
*/
/*
Button
Turns on and off a light emitting diode(LED) connected to digital
pin 13, when pressing a pushbutton attached to pin 2.
The circuit:
LED attached from pin 13 to ground
pushbutton attached to pin 2 from +5V
10K resistor attached to pin 2 from ground
Note: on most Arduinos there is already an LED on the board
attached to pin 13.
created 2005
by DojoDave <http://www.0j0.org>
modified 30 Aug 2011
by Tom Igoe
This example code is in the public domain.
http://www.arduino.cc/en/Tutorial/Button
*/
// constants won't change. They're used here to
// set pin numbers:
//https://github.com/fdebrabander/Arduino-LiquidCrystal-I2C-library
#include <LiquidCrystal_I2C.h>
LiquidCrystal_I2C lcd(0x27, 16, 2);
const int buttonPin = 2; // the number of the pushbutton pin
const int ledPin = 13; // the number of the LED pin
// Variables will change:
int buttonPushCounter = 0; // counter for the number of button presses
int buttonState = 0; // current state of the button
int lastButtonState = 0; // previous state of the button
#include <Servo.h>
Servo myservo;
void setup()
{
Serial.begin(115200);
myservo.attach(9);
myservo.write(90);
pinMode(10, OUTPUT);
lcd.begin();
lcd.backlight();
// initialize the LED pin as an output:
pinMode(ledPin, OUTPUT);
// initialize the pushbutton pin as an input:
pinMode(buttonPin, INPUT);
}
void loop(void)
{
int A0Value = analogRead(A0);
int delaytime = map(A0Value, 0, 1023, 1,6);
int A1Value = analogRead(A1);
int hitTime = map(A1Value, 0, 1023, 1, 9);
// lcd.clear();
lcd.setCursor(0, 0);
lcd.print(delaytime);
lcd.print("s ");
lcd.setCursor(0, 1);
lcd.print(hitTime);
lcd.print("hits ");
// read the pushbutton input pin:
buttonState = digitalRead(buttonPin);
// compare the buttonState to its previous state
if (buttonState != lastButtonState) {
// if the state has changed, increment the counter
if (buttonState == HIGH) {
// if the current state is HIGH then the button
// wend from off to on:
buttonPushCounter++;
Serial.println("on");
Serial.print("number of button pushes: ");
Serial.println(buttonPushCounter);
} else {
// if the current state is LOW then the button
// wend from on to off:
Serial.println("off");
}
// Delay a little bit to avoid bouncing
delay(50);
}
// save the current state as the last state,
//for next time through the loop
lastButtonState = buttonState;
// turns on the LED every four button pushes by
// checking the modulo of the button push counter.
// the modulo function gives you the remainder of
// the division of two numbers:
if (buttonPushCounter % 2 == 0) {
digitalWrite(ledPin, HIGH);
for (int i = 1; i <= hitTime; i++) {
for (int i = 100; i < 180; i++)
{
myservo.write(i);
delay(delaytime*1000/(2*80));
}
for (int i = 180; i > 100; i--)
{
myservo.write(i);
delay(delaytime*1000/(2*80));
}
}
buttonPushCounter++;
}
}